Showing posts with label landmark. Show all posts

Tuesday, 24 March 2015

Uncovering Unexploded Ordnance

Today we woke up to reports of a huge unexploded World War II bomb being identified at a building site in Southwark, south London.

With households within the vicinity evacuated while the Army manages the safe removal of the device, it highlights the importance of undertaking Unexploded Ordnance (UXO) assessments at the outset of any building development works, as the probability of identifying UXO originating from the Second World War might not be as uncommon as you think.  

According to the Construction Industry Research and Information Association (CIRIA), between 2006 and 2009, approximately 15,000 devices were removed from construction sites – of which 5% were live.

Add to this, it has been reported that during WWII over 17,000 tonnes of explosive fell on London alone, with figures suggesting that approximately 10% did not detonate on impact. 

Site Assessments:

Help is available to the construction industry: the first port of call is a desktop tool called a Preliminary UXO Risk Assessment. It quickly provides a 'yes/no' answer as to whether there is any risk of encountering a bomb. It has been developed in line with guidance from CIRIA and endorsed by the Health and Safety Executive.

If a positive ‘yes’ output is identified, the next stage of assessment is to conduct a Detailed UXO Risk Assessment. This will detail the type of threat, the size, origin and also takes into account the proposed construction method and how that would impact on risk of detonation.  Risk mitigation measures are then provided to allow construction to proceed.

The ‘Bomb Search’ assessments are available from Envirocheck, part of Landmark Information Group, and are provided by renowned experts in the field of UXO, 6 Alpha Associates.
 Envirocheck Bombsearch - 6 Alpha Associates

Talking about the potential risks, Simon Cooke, Managing Director at 6 Alpha Associates, in partnership with Landmark Information Group, said:

“Encountering an unexploded bomb on a construction site is a low probability but extremely high consequence event, particularly when you take into account potential loss of life. Not to mention shock waves which could spread underground for some distance, causing damage to foundations and other underground works.   As we see it, it is the potential consequence, rather than the probability, which really drives the importance of undertaking detailed risk assessments before any work starts.”

Ultimately, at the start of any new ground works project, the first stage Preliminary search is a must. While the potential risk may be considered small, it is clear it should not be overlooked for the ultimate safety of all concerned.

More details regarding Envirocheck Bomb Search can be found here:

More details regarding 6 Alpha can be found here:

Related News Link:

Wednesday, 5 November 2014

Promap Masterclass - Article 12

This Masterclass deals with historical mapping. We currently have the largest database in existence of OS Historical mapping and it is accessible via Promap.


Where to obtain your Historical mapping in Promap


Historical maps in Promap can be ordered as either individual maps or as a variety of map packs.
  • Individual Maps – These can be ordered using the Historic maps tab at the left hand side of the screen, the maps will be displayed in the date order in which they were published.
  • Historic Map Pack (Including Historical Aerial Photography) – This comprises the 1:2500 and 1:10,000 maps available for your site and also Historical town plans, historical building plans, Russian military mapping and Historic Aerial Photography, they  can be ordered by using either the historic map tab on the left hand side of the screen or through the reports ordering process
  • Historic Map Packs at 1:2,500 and 1:10,000 (excluding Historic Aerial Photography) – These options are available via the Export data section at the left hand side of the screen.


NOTE: Historic Aerial Photography can also be ordered from the Export data section under the category Aerial Photography as a separate dataset. 

Ensuring the best possible coverage for your individual historical maps


To ensure get the best possible coverage on your individual historic maps, use the coverage column and the preview option to ensure it covers the area of the map you are interested in.

For more detailed advice on Promap why not book one of our training courses (which are all now FREE) or visit our training website by clicking here to find other useful tips and training aids.

If there are any other topics you would like to see included in the Masterclass blogs or if you have any other questions please call us on 0844 844 9965 or email us at training@promap.co.uk

Friday, 31 October 2014

Paranormal Energy and InFEARstructure Report!

We'd like to wish everyone a Happy Halloween from our Legal Team! 

For this special occasion we have made some new changes to our Energy and InFEARstructure report.

 ​Please ensure that you read and digest the important information on the attached sample and if you have any questions, do not hesitate to get in touch! 

P.S We are making changes to our actual Energy & Infrastructure report and will be in touch soon.

Wednesday, 29 October 2014

Promap Masterclass - Article 11

This instalment of our Promap Masterclass articles looks at ordering reports from Promap. This process follows the common style of online purchasing:

  • Select your product
  • Add it to your shopping basket
  • Confirm your delivery details
  • Checkout at the end

Whilst this is a fairly simple process there are a couple of features which can assist with this.

The Promap Masterclass is run in conjunction with our free Promap Masterclass webinars, which demonstrate the features in action.  To register for the next free webinar click here.

Use the free to view layers to order your reports


When ordering your reports from Promap, define the area you want for your report using one of the free to view layers, such as VML Raster, to avoid an unnecessary viewing charge.

Editing the address for your report


To ensure the correct address for your site is shown on your report use the edit option on the left hand side of the reports section to alter it as required.

Tracking and re-downloading your reports


To locate your report and track its progress, click on the Order tracking option under Reports to access a number of different search options.

Once you have located your report, re-download it using the following steps:
  • Click on the orange plus sign to the left of the order date to view the details of the report.
  • Select the “Retrieve this file” option from the right hand side of the screen
  • This will now add the report to the download manager section of Promap which can be located under the “Export data” tab on the left hand side of the screen.

Where to obtain sample data and reports


There are a variety of methods within Promap for obtaining information about our data or accessing samples reports.  Some of these are listed below:

  • Click on the “Maps & Data” option on the Promap login screen to view details of all the datasets and reports contained in Promap.  You can also view samples in a variety of formats.
  • To access samples of our reports follow the process for ordering site reports. Then on the “Product Selection”  screen select the option under the product name for “More info and samples”
  • To obtain information about the datasets in Promap Export hover over the orange ‘I’ button to the right of each dataset to display a dialogue box 

For more detailed advice on Promap why not book one of our training courses (which are all now FREE) or visit our training website by clicking here to find other useful tips and training aids.

If there are any other topics you would like to see included in the Masterclass blogs or if you have any other questions please call us on 0844 844 9965 or email us at training@promap.co.uk

Friday, 24 October 2014

Promap Masterclass - Article 10

This week we deal with exporting data from Promap.

The Promap Masterclass is run in conjunction with our free Promap Masterclass webinars, which demonstrate the features in action.  To register for the next free webinar click here.

Using the free to view layers to export OS Detail Data


To avoid an unnecessary viewing charge when exporting OS Detail data from Promap:
  • Define the area you want to export using one of the free to view layers i.e VML Raster
  • When you are at the stage of selecting your datasets choose the OS Detail layer from the options.
Defining your export site using the shape tool


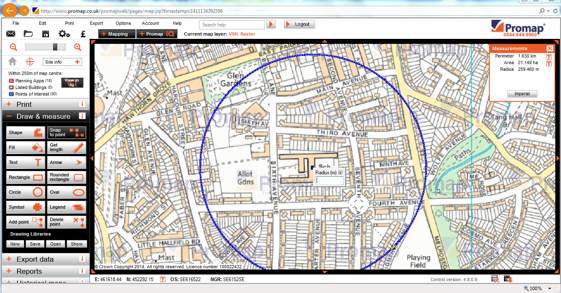
To avoid unnecessary time cropping your data and to keep costs down, you can more accurately define the area you are looking to export by using “Set shape frame” in “Step 1 options” under Export Data. This activates the shape tools which enable you to accurately define the site, this way you only export and pay for the data you want.

New datasets and dataset information 


  • Any new datasets that have been added to Promap are now displayed under the “Current Mapping and New Data” category. Promap will automatically take you here once you have defined your site and clicked on the “Get export data” tab under the export options.
  • Hover over the orange ‘I’ button next to the listed datasets to view dataset details, including delivery times and available formats.
Download Notification       


The delivery time of some datasets, such as our bespoke range, is slightly longer. To relieve you from having to log in to Promap to check the data availability, we’ve included the option “Email me when my files are ready to download”.  Select this option and confirm your email address to receive an email notification.

If you found this Masterclass useful, keep an eye out for the next one. For more detailed advice on Promap why not book one of our training courses (which are all now FREE) or visit our training website by clicking here to find other useful tips and training aids.

If there are any other topics you would like to see included in the Masterclass blogs or if you have any other questions please call us on 0844 844 9965 or email us at training@promap.co.uk

Wednesday, 22 October 2014

Envirocheck Masterclass - Article 3

This week we look at advanced drawing options to help you accurately define your site.

The Envirocheck Masterclass is run in conjunction with our free Masterclass webinars, which demonstrate the features in action.  To register for the next free webinar click here.


Envirocheck advanced drawing tools


When using Envirocheck to outline your site there are some keyboard shortcuts which can help speed up the process:
  • “add point/remove point” – If you realise you have made a mistake after outlining your site rather than delete the shape and start again, simply use either the “add point” or “remove point” options to amend your shape.
  • Space Bar – Instead of clicking on each dot around the curve to outline your site when using Snap to Point:
    • Click on the first white dot
    • Then hold down the space bar and click on the last white dot
    • (Note: The orange and white dots are sourced from different databases. So if you have an orange dot along the curve you will have to click to that before the next white dot to use this shortcut)  
  • L Key – Press L whilst using the shape tool to fix the length of the line.
  • A Key – Press A whilst using the shape tool to fix the angles for your shape. 

For more detailed advice on Envirocheck  or if there are any other topics you would like to see included in the Masterclass emails or if you have any other questions please call us on 0844 844 9965 or email me at nick.mills@landmark.co.uk.

Monday, 13 October 2014

Envirocheck Masterclass - Article 2

In this Envirocheck Masterclass we continue to deal with locating your site and looking at the methods for most quickly and accurately defining your site once you have it displayed.

The Envirocheck Masterclass is run in conjunction with our free Masterclass webinars, which demonstrate the features in action.  To register for the next free webinar click here.

Tools to define your site


A variety of options in Envirocheck allow you to accurately define your site. These are as follows:
  • Point Tool – Obtain information around a point on the map using the buffer zones
  • Autofill Tool –Automatically apply an outline to a single self-contained shape on the map
  • Shape Tool – Define your own site outline and combine it with the snap to point option for greater accuracy
  • Linear Tool – Ideal for trenches, Roadways, river systems etc., use along with the Linear Site width option to more accurately define the width of your site

Undo option


Use the delete button to undo the last click and make corrections if you click on the wrong point while drawing outlines. 

Opening a shape to repair it


If you realise that you have made a mistake with your site outline after completing it, there is no need to delete it and start again. Instead  left click on the map away from your shape to deselect it and then left click back on your shape to reselect it then press return on the keyboard to open it back up.   

If you found this Envirocheck Masterclass useful, keep an eye out for the next one. For more detailed advice on Envirocheck  or if there are any other topics you would like to see included in the Masterclass emails or if you have any other questions please call us on 0844 844 9965 or email t nick.mills@landmark.co.uk.

Landmark Information Group introduces new Licence Management Service to digital mapping products

We've introduced a new Licence Management functionality to the Promap digital mapping platform. The service makes it easier to renew export data licences in accordance with Ordnance Survey regulations, as well as viewing and managing licences online. 

The new Licence Management tool is designed to support clients in ensuring all export data purchased from our Promap service fully complies with Ordnance Survey terms and conditions, avoiding any penalties for expired or incorrect licences.

Carole Ankers, Product Development Director at Landmark Information Group said: “The introduction of Licence Management is one of our latest product enhancements and is designed to support our customers in keeping all data in licence.  It makes it easy to renew digital data export licences and centrally manage them in one single place. It also helps keep users notified of when a licence is about to expire so a renewal can be organised.”

Nick Macready, Strategic Partner Manager from Ordnance Survey: “We encourage the use and exploitation of mapping and data by providing a wide range of licences that focus on how customers wish to use our information and the rights we grant for those uses.   We have a series of licences, which underpin the rights being granted for use of Ordnance Survey products.  By implementing the new Licence Management tool in Promap, Landmark ensures its customers can benefit from the most current version and also fully comply with the correct licence for the mapping and data that each customer accesses via the service, and we applaud them for supporting our drive to clampdown on un-licenced data.”

For more information on Promap, telephone 0844 844 9960 or visit www.promap.co.uk.    

Wednesday, 1 October 2014

Promap Masterclass - Article 8

This articles looks at more advanced customisation tools available to you in Promap. The tools in this section are all accessed by right clicking on your selected shape to display an advanced drawing tools menu. The tools available are:
  • Cloning Shapes
  • Grouping Shapes
  •  Aligning Shapes
  •  Spacing Shapes
  •  Drawing Libraries
These blog articles are run in conjunction with our free Masterclass webinars, which demonstrate the features in action.  To register for the next free webinar click here.


Cloning Shapes 


To duplicate shapes in Promap, rather than re- drawing or copying and pasting them right click on your selected object and select the clone option from the drop down menu that appears.


Grouping Shapes within Promap


When working with multiple objects within Promap the ability to group objects can be very useful. To select the items that you want to group either:
  •  Hold down the CTRL key and left click on each of the items you want to select; or
  •  Hold down the SHIFT key and the left click button on the mouse and create an outline around all the items you want to select.
Once the items are selected right click on your mouse to bring up the advanced drawing tools drop down box and select group from the options. 


Aligning and Spacing shape


To align or space shapes on your map:
  •  Select the two objects (using either of the two methods mentioned under “Grouping shapes” above) and right click on them
  • Instead of grouping them select the “Sizing and Shaping Option” to align, size or space the shapes.  

Drawing libraries


Rather than creating the same shapes on your maps repeatedly, save the shape in a drawing library. 

To save your shape to the drawing library:
·         Draw the shape
·         Right click on the shape
·         Select “Special”
·         Click on “Add to drawing library”

When the shape is next required:
·         Open the relevant library
·         Drag and drop the shape to the required location on the map

Use the Drawing Libraries options at the bottom of the “Draw and Measure Section” to create a new drawing library, save a drawing library, open a previously saved drawing library or show your currently selected drawing library.

NOTE: Drawing libraries can only be used on the map layer where they were created i.e. a drawing library created on the OS detail layer can only be used on OS detail maps.
 
If you found this Masterclass useful, keep an eye out for our next Masterclass blog which is due to be sent on the 8th October 2014 . For more detailed advice on Promap why not book one of our training courses (which are all now FREE) or visit our training website by clicking here to find other useful tips and training aids.

Thursday, 25 September 2014

Dataset Focus: Agency and Hydrological

Today's focus is on our archive of Agency and Hydrological data, which is designed to establish the risk of flooding and hydrological contamination to your site.  

Click here to access the further information


Wednesday, 24 September 2014

Promap Masterclass- Article 7

The seventh in our Promap Masterclass blogs is the first of two looking at the more advanced customisation tools available to you in Promap.. 

These blog articles are run in conjunction with our free Masterclass webinars, which demonstrate the features in action.  To register for the next free webinar click here.


Multiple Point Selection


When outlining or measuring a curve using Snap to Point you can join up multiple white dots more quickly using the space bar. Instead of clicking on each dot around the curve, click on the first white dot then hold down the space bar and click on the last white dot.

NOTE : because the orange and white dots on your outline come from different databases, if you have an orange dot along the curve you will have to click to that first , then to the next white dot to use this curve shortcut   

Selecting Drawn items


If you are having problems selecting items you have created on the screen then use the following options :

N Key – Pressing N on the keyboard will tab forward throught the customisation you have added in the order it was created.

P Key – Pressing P on the keyboard will tab backward throught the customisation you have added in the order it was created.


Setting Lengths, Angles and Radius


The following tools will allow you to more accurately create shapes on your map:

L Key- Pressing L whilst using the Sshape tool allows you to fix the lngth of the line.

A Key – Pressing A whilst using the Shape tool allows you to fix the angles for your shape

R Key – Pressing R whilst using the circle tool allows you to fix the radius for your circle

  
If you found this Masterclass useful, keep an eye out for our next Masterclass blog which is due to be sent on the 1st October 2014 . For more detailed advice on Promap why not book one of our training courses (which are all now FREE) or visit our training website by clicking here to find other useful tips and training aids.

If there are any other topics you would like to see included in the Masterclass blogs or if you have any other questions please call us on 0844 844 9965 or email us at training@promap.co.uk