Showing posts with label Promap Features of the week. Show all posts

Wednesday, 5 November 2014

Promap Masterclass - Article 12

This Masterclass deals with historical mapping. We currently have the largest database in existence of OS Historical mapping and it is accessible via Promap.


Where to obtain your Historical mapping in Promap


Historical maps in Promap can be ordered as either individual maps or as a variety of map packs.
  • Individual Maps – These can be ordered using the Historic maps tab at the left hand side of the screen, the maps will be displayed in the date order in which they were published.
  • Historic Map Pack (Including Historical Aerial Photography) – This comprises the 1:2500 and 1:10,000 maps available for your site and also Historical town plans, historical building plans, Russian military mapping and Historic Aerial Photography, they  can be ordered by using either the historic map tab on the left hand side of the screen or through the reports ordering process
  • Historic Map Packs at 1:2,500 and 1:10,000 (excluding Historic Aerial Photography) – These options are available via the Export data section at the left hand side of the screen.


NOTE: Historic Aerial Photography can also be ordered from the Export data section under the category Aerial Photography as a separate dataset. 

Ensuring the best possible coverage for your individual historical maps


To ensure get the best possible coverage on your individual historic maps, use the coverage column and the preview option to ensure it covers the area of the map you are interested in.

For more detailed advice on Promap why not book one of our training courses (which are all now FREE) or visit our training website by clicking here to find other useful tips and training aids.

If there are any other topics you would like to see included in the Masterclass blogs or if you have any other questions please call us on 0844 844 9965 or email us at training@promap.co.uk

Wednesday, 8 October 2014

Promap Masterclass - Article 9

The ninth instalment of our Promap Masterclass blogs looks at Promap IQ, which enables you to obtain planning application, listed building and points of interest information for your site and the surrounding area.

These blog articles are run in conjunction with our free Masterclass webinars, which demonstrate the features in action.  To register for the next free webinar click here.


Accessing Promap IQ


 To access Promap IQ:
  • Open the map of your site
  •  Click on either the Promap IQ tab above the top left hand corner of the map or the Promap IQ teaser box on the left hand side of the screen.
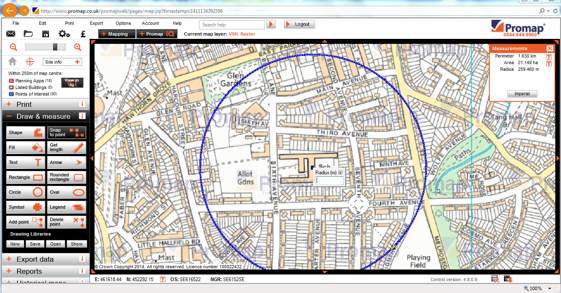

The teaser box will appear on the  “Street” , “VML Raster”, “Aerial” , “OS Detail” or “UKMap Detail” (for sites in London) layers for your site and shows how many planning applications, listed buildings and points of interest you have within 250m of the site.


Promap IQ – Filters Screen


The filters screen enables you to specify what information Promap IQ will display. Your options are:
  • Search Radius –select a search area anything from 50m to 5km
  • Planning Applications –select applications based on category, date (as far back as 1997), type or size. You can remove all the planning applications with an estimated project value under £100,000 by unticking this last option
  • Listed Buildings – These can be selected by the following grades:
    • Grade 1
    • Grade 2*
    • Grade 2
  • Points of Interest – These can be selected by category.  There is also an option to edit each category for the information you need. Points of Interest data enables you to view the social infrastructure for an area i.e. doctors, surgeries, dentists, schools etc.

Note 1: The 500 search results provided by Promap IQ for each of the three categories are the 500 nearest rather than the 500 newest.

Note 2: Listed buildings will not appear for Scotland and Wales.  This data is only available for England.

Note 3: All the data in Promap IQ is updated on a regular basis to ensure accuracy. The update cycles are:
  • Planning Applications – 6 Weeks
  • Listed Buildings - Annually
  • Points of Interest – 6 Months  


Your search results are then displayed on the map via icons, the key for which can be found under the “Spot Legend” at the top of the screen. 


Promap IQ – Detailed Information


Once you have paid the charge to view the detailed information you will be taken to the above screen.  You can use the “Detailed Information” section on this screen to view the following:
  • High level information about planning applications. You are able to copy the application ID number to a clipboard and use the provided link to the local authority website where you can paste the ID number and view the full application.   
  • Detailed information about listed buildings using the Listed Buildings information, which enables you to access English Heritage’s website “Images of England”.
  • Points of interest will give you high level information on all of the results in the area.

The local plan tab in the top right hand corner of the screen will display links if you wish to access the local plan or local development framework.

At this stage, you have the opportunity to purchase the information in PDF or spreadsheet format (the spreadsheet can also be selected with geo-coordinates for more accurate positioning of information).
  
If you found this Masterclass useful, keep an eye out for our next Masterclass blog. For more detailed advice on Promap why not book one of our training courses (which are all now FREE) or visit our training website by clicking here to find other useful tips and training aids.

If there are any other topics you would like to see included in the Masterclass blogs or if you have any other questions please call us on 0844 844 9965 or email us at training@promap.co.uk

Wednesday, 1 October 2014

Promap Masterclass - Article 8

This articles looks at more advanced customisation tools available to you in Promap. The tools in this section are all accessed by right clicking on your selected shape to display an advanced drawing tools menu. The tools available are:
  • Cloning Shapes
  • Grouping Shapes
  •  Aligning Shapes
  •  Spacing Shapes
  •  Drawing Libraries
These blog articles are run in conjunction with our free Masterclass webinars, which demonstrate the features in action.  To register for the next free webinar click here.


Cloning Shapes 


To duplicate shapes in Promap, rather than re- drawing or copying and pasting them right click on your selected object and select the clone option from the drop down menu that appears.


Grouping Shapes within Promap


When working with multiple objects within Promap the ability to group objects can be very useful. To select the items that you want to group either:
  •  Hold down the CTRL key and left click on each of the items you want to select; or
  •  Hold down the SHIFT key and the left click button on the mouse and create an outline around all the items you want to select.
Once the items are selected right click on your mouse to bring up the advanced drawing tools drop down box and select group from the options. 


Aligning and Spacing shape


To align or space shapes on your map:
  •  Select the two objects (using either of the two methods mentioned under “Grouping shapes” above) and right click on them
  • Instead of grouping them select the “Sizing and Shaping Option” to align, size or space the shapes.  

Drawing libraries


Rather than creating the same shapes on your maps repeatedly, save the shape in a drawing library

To save your shape to the drawing library:
·         Draw the shape
·         Right click on the shape
·         Select “Special”
·         Click on “Add to drawing library”

When the shape is next required:
·         Open the relevant library
·         Drag and drop the shape to the required location on the map

Use the Drawing Libraries options at the bottom of the “Draw and Measure Section” to create a new drawing library, save a drawing library, open a previously saved drawing library or show your currently selected drawing library.

NOTE: Drawing libraries can only be used on the map layer where they were created i.e. a drawing library created on the OS detail layer can only be used on OS detail maps.
 
If you found this Masterclass useful, keep an eye out for our next Masterclass blog which is due to be sent on the 8th October 2014 . For more detailed advice on Promap why not book one of our training courses (which are all now FREE) or visit our training website by clicking here to find other useful tips and training aids.

Wednesday, 24 September 2014

Promap Masterclass- Article 7

The seventh in our Promap Masterclass blogs is the first of two looking at the more advanced customisation tools available to you in Promap.

These blog articles are run in conjunction with our free Masterclass webinars, which demonstrate the features in action.  To register for the next free webinar click here.


Multiple Point Selection


When outlining or measuring a curve using Snap to Point you can join up multiple white dots more quickly using the space bar. Instead of clicking on each dot around the curve, click on the first white dot then hold down the space bar and click on the last white dot.

NOTE : because the orange and white dots on your outline come from different databases, if you have an orange dot along the curve you will have to click to that first , then to the next white dot to use this curve shortcut   

Selecting Drawn items


If you are having problems selecting items you have created on the screen then use the following options :

N Key – Pressing N on the keyboard will tab forward throught the customisation you have added in the order it was created.

P Key – Pressing P on the keyboard will tab backward throught the customisation you have added in the order it was created.


Setting Lengths, Angles and Radius


The following tools will allow you to more accurately create shapes on your map:

L Key- Pressing L whilst using the Sshape tool allows you to fix the lngth of the line.

A Key – Pressing A whilst using the Shape tool allows you to fix the angles for your shape

R Key – Pressing R whilst using the circle tool allows you to fix the radius for your circle

  
If you found this Masterclass useful, keep an eye out for our next Masterclass blog which is due to be sent on the 1st October 2014 . For more detailed advice on Promap why not book one of our training courses (which are all now FREE) or visit our training website by clicking here to find other useful tips and training aids.

If there are any other topics you would like to see included in the Masterclass blogs or if you have any other questions please call us on 0844 844 9965 or email us at training@promap.co.uk

Thursday, 11 September 2014

Promap features of the week - Article 6

The sixth offering in our Promap ‘Features of the week’ blog looks at printing your map as a PDF or saving as an image.

These blog articles are run in conjunction with our free Masterclass webinars, which demonstrate the features in action.  To register for the next free webinar click here


When setting and fixing print frames there are a few points that will make the process easier:
  • Use the “Set frame” option under the print tab to set the paper size, orientation and scale for your map.
  • When choosing a paper size you will be given three options for A4:
    • A4 small - a smaller area of mapping and larger margins at the side and bottom of your page.  This is useful if you want to put more information into your footer.
    • A4 - the standard size 
    • A4 Large –reduces the margins at the side and bottom of the page to the minimum to give you a larger print area. This can mean the difference between leaving your map at A4 size or upping it to A3 to fit your print area in and increasing the cost accordingly.
  •  When using the “Setup Print Frame” dialogue box use the “Apply” option at the bottom to put your frame on to the screen and at the same time leaving the dialogue box open to make any adjustments.
  • To reposition your frame on the screen once you have set it (but before fixing it) either:
    • Put your cursor inside the frame, hold down the left click button and drag it.
    • Or alternatively left click inside it and use the cursor keys on your keyboard to move it. 
Note: Using the print button under the step 2 option will enable you to quickly apply a frame but gives you no control over the paper size , orientation of the page, scale or position of the frame.

Headers and Footers


When applying headers and footers to your map click on the “Show fonts & logos” tab to open up a separate dialogue box. This dialogue box gives you more control over your header and footer text via the font option and will also enable you to add your company logo.

Note: Your logo will need to be in .WMF format.  If it is not currently in this format, forward your logo to us at ‘tech@landmark.co.uk’and we will convert it to a .WMF file for you.

Printing Options


Under the print section you are given two options :
  • Print – produce your map as a hard copy or a PDF if you have PDF writing software.
  • Save as Image – save your map as a Jpeg, PNG, GIF or Bitmap file.

Note: When using the Print options in Promap it will charge you for whichever you do first out of ”Printing” or “Save as image”.  You can perform the other action without incurring the full print charge again once the first charge has been accepted.

Reusing Previously Saved Print Frames


If you save your map in Promap after printing it and do not change the scale of the frame or move the frame, you can then reprint that map for the following twelve months for a very small reprint cost or no cost at all if you have an Ordnance Survey Paper Map Copying Licence.
  
If you found this Masterclass useful, keep an eye out for our next Masterclass blog which is due to be sent on the 24th September 2014. For more detailed advice on Promap why not book one of our training courses (which are all now FREE) or visit our training website by clicking here to find other useful tips and training aids.

If there are any other topics you would like to see included in the Masterclass blogs or if you have any other questions please call us on 0844 844 9965 or email us at training@promap.co.uk

Wednesday, 3 September 2014

Promap Masterclass- Article 5

This fifth article looks at the settings within Promap and the expenditure reporting.

Promap Settings


The settings section within Promap gives you the opportunity to personalise the map and saving options within the system. It is accessed via the cog icon in the top left hand corner of the screen.

Once in the settings section you will have the following options. 

The main options are: 
·         ”Project” and “Reference” - will enable you to update the information entered into the expenditure details boxes for this project.
·         “Starting dialog” - will allow you to personalise which search option appears first when looking for sites.  This can be altered to “Locate by” to search for new sites or to one of the options that allows you to search through your previously saved maps.
·         “Check for saved maps when locating an address” - automatically prompts Promap to search through your previously saved maps when searching for a new site.
·         “Prompt to save map after printing / exporting” - ensures that whenever you incur a charge relating to these two functions a save screen will appear to allow you to record the fact that this charge has been paid. This can reduce costs for re-printing or re-exporting that map for twelve months after.
·        “Default Map Display” for OS / UKMap -   Set your preferred map style as the default for any new maps you open up.
·         “Area units” - enables you to set the measurement units in Promap so they appear in either m/ ft 2 or hectares and acres
·        “Site marker style” - enables you to alter the appearance of your sites marker on the map. 

Expenditure Reporting


If you are looking to allocate the cost of a map to a particular client or project and do not want to have to wait for your Promap invoice to come through, the” Account expenditure” option accessed via the pound sign icon in the top left hand corner of the screen will allow you to access a report called “Project / Reference Summary”.  This will show you all the costs incurred on the system and the projects and references they relate to (as entered into the expenditure details boxes at the time of charging). This report will also allow you to set the date range for the report as well meaning that you can obtain this information much faster.

Free Masterclass webinar: These features and more will be demonstrated during the next free webinar on 19 September 2014. To register, click here

If you found this article useful, keep an eye out for our next Masterclass blog which is due to be sent on the 10th September 2014. For more detailed advice on Promap why not book one of our training courses (which are all now FREE) or visit our training website by clicking here to find other useful tips and training aids.

If there are any other topics you would like to see included in the Masterclass blogs or if you have any other questions please call us on 0844 844 9965 or email us at training@promap.co.uk

Images: Ordnance Survey © Crown copyright and/or Database Right. All rights reserved. Licence 100022432

Wednesday, 27 August 2014

Promap features of the week - Article 4

This week we deal with basic tips for customisation of your maps.

·         How to avoid accidentally dragging shapes out of position
·         How to undo incorrect points when in the process of adding a site outline
·         How to re-open an outline once completed to alter it

How to avoid accidentally dragging shapes out of position


When roaming around on your map screen (primarily when using the left click and drag option) there is the chance that you may accidentally drag a shape out of position. To avoid this happening you can choose either of the following two options:

  • Hold down the ALT key whilst roaming on your map. This will act as a temporary lock key and will hold everything in position.
  • Right click on your shape when you have it selected and select the lock option from the drop down menu (shown in the image above).


How to undo incorrect points when in the process of adding a site outline
  • If you make a mistake whilst in the process of applying a site outline using the shape tool in Promap you can undo it using the “backspace” key on your keyboard.
How to re-open an outline once completed to alter it


If you have made a mistake on your outline, rather than delete it and start again just follow the steps below:

·         Turn off shape tool
·         Left click away from your shape
·         Left click back on your shape to select it
·         Press return/enter on the keyboard    

This will undo the final click that completed your shape, undoing it and then allowing you to use the “backspace” key to rectify the shape.

Free Masterclass webinar: These features and more will be demonstrated during the next free webinar on 19 September 2014. To register, click here

If you found this Masterclass useful, keep an eye out for our next Masterclass blog which is due to be sent on the 3rd September 2014 . For more detailed advice on Promap why not book one of our training courses (which are all now FREE) or visit our training website by clicking here to find other useful tips and training aids.

If there are any other topics you would like to see included in the Masterclass blogs or if you have any other questions please call us on 0844 844 9965 or email us at training@promap.co.uk